


Suppose you are having a lot of abnormal data in your instance and you are thinking about fixing it for a very long time. Field normalization plays an important role here to resolve your data quality issues and standardize them. It is very important to keep all the data in a more organized way with less redundancy to optimize the quality levels in it. We can simply start it with the CPU type field in the computer forms.
The records are added in the ServiceNow platform from various sources like importing records, manual entry. A field value can appear in various forms based on how it is added or introduced to the database.
Types of Field normalization
Field normalization has two different ways to increase data integrity and reduce redundancy.
ServiceNow Normalization
Normalization looks for the variations of similar field values and converts them all into a preferable single standardized value. You can normalize all the field values in ServiceNow.
Normalization forces the platform to eliminate duplicate records and focus on making the searching process better for everyone. When a user enters a value in the normalized field then the system decides to normalize it automatically by replacing it with a standard value. Normalization works better with descriptive values like names and standard units of measurements.
Examples of ServiceNow Normalization
Operating system
You can easily import the details of configuration items from discovery. The name of operating systems will vary based on the information stored in the system.
- Windows 7 Pro
- Windows® 7 Pro
- Windows ® 7 Pro
- Microsoft Windows 7 Professional
- Microsoft Windows Professional 7
As you can see there are many different operating system names for the windows operating system we can standardize all of them with a normalized value like “Microsoft Windows 7 Professional”. It will make reporting and reconciliation easier.
Manufacturer
Hp has different manufacturer names based on various imports and discovery scans. Field normalization will take all these names and convert them to a common value “HP”.
- HP
- HP Inc.
- Hewlett-Packard
- Compaq
Field normalization will take all these names and convert them to a common value “HP”.
Transformation
It allows an administrator to transform the raw field values into standardized values. The administrator can control the transformation by defining rules and conditions for the field values.
Examples of Transformation
Disk space
You can round off the disk size to the transformed value after rounding off the values. Suppose you have 9.8 GB of disk space; you can round it off to 10 GB, 4112 MB to 4000 MB.
How does ServiceNow Normalization work?
Step 1: – Creation of normalization record
- Navigate to Field Normalization > Configurations > Normalizations.
- Click New.
- Create a normalization record.
Add these values after a better understanding of field and input values.
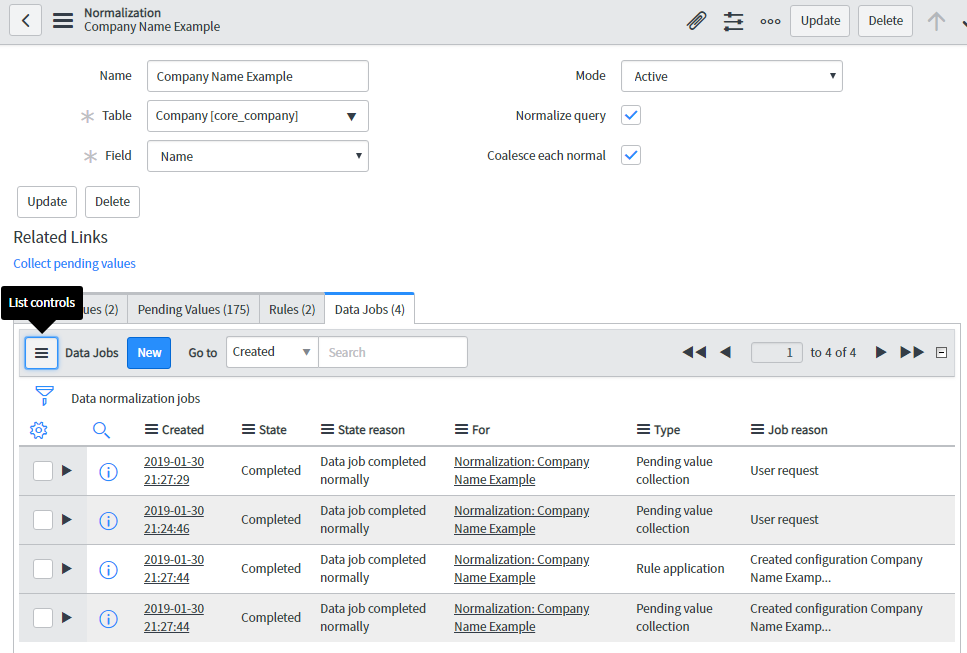
Fields
- Name– this is the unique name creation for the normalization record. We use it just for reference purposes.
- Table– In this, you will select the ServiceNow table for the field being normalized.
- Field-Select the field to normalize.
- Mode-There are three modes of normalization. It can be active, test, off. All normalization records are created in test mode by default. If you are selecting aliases for your normal values, you should change your mode to “active”. We use “off” mode for the purpose of disabling the normalization.
- Normalize query-Apply to all queries using this field.
- Coalesce each normal-Select this checkbox to reset all the references in the database to records containing an alias value
- Raw Field-Select this field to show the original/non-normalized input values in a form.
After adding these field values. Click save
Step 2: -Create normal values
Normal values are the standardized value that will replace all the variations of values in the system. It will help you to reduce duplicate values and ambiguity in your records.
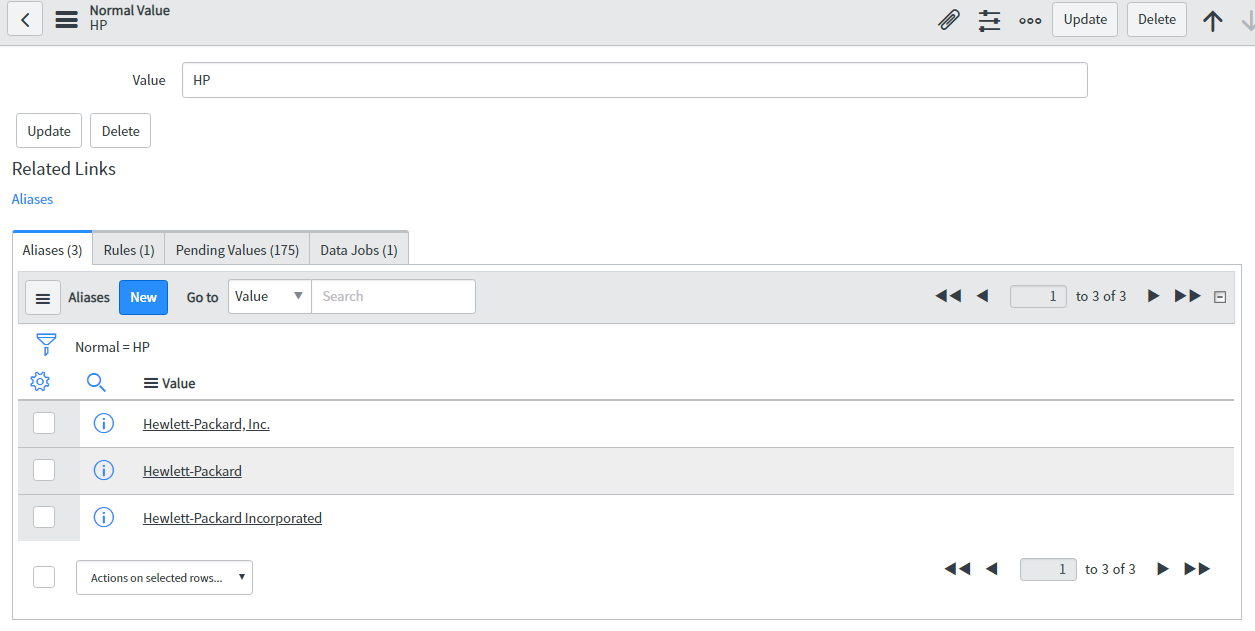
Step 3: -Create Alias
Aliases are the variants of the field values that will be later replaced by the normal values So, we can say that alias are the different names of the same record in the table. ServiceNow allows you to define your own aliases.
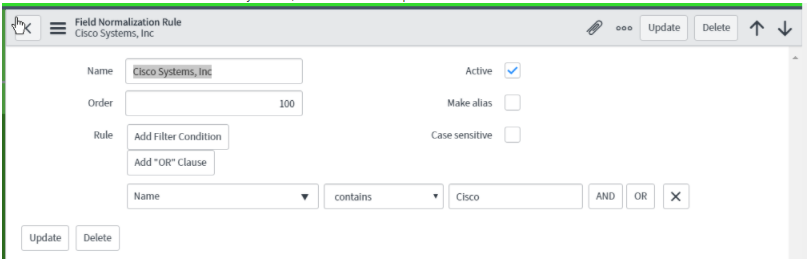
Step 4: -Set up Rules
Here you can define your own rules for normalization based on the patterns. For e.g.- the CPU type contains “Xeon”.
Step 5: – Optional raw field
It is one of the important custom fields created by administrators to show the original values of normalized values.
Step 6: -Activation
If you are ready for the job. You can turn the mode to active.
Step 7: – Run data jobs
The process of field normalization creates data jobs to normalize the value.
Step 8: – Normalization in action
When all the data jobs will be finished then, you will get your normalized data.
Step 9: – Rollback
The data rollback feature allows you to undo the normalization at different stages before committing changes.
To conclude finally, this was all about the steps of employing field normalization and transformation to best resolve the data quality issues in ServiceNow.
Thanks For Reading
Read More on Aelum Blogs
Author: Rati Kumari Jha
Designation: Technical Content Writer