Objective Of ServiceNow Virtual Agent :
ServiceNow® Virtual Agent is a platform for providing user assistance through conversations within a messaging interface. Primary objective of Virtual Agent is to perform the following
- Obtain information
- Make decisions
- Perform common work tasks
There are several documents available to activate and set up VA in the public domain. If you are new to Virtual Agent my suggestion is visit through this blog here and continue.
While working on VA, I encountered a few challenges and it took a while to overcome all those challenges. We were able to overcome challenges in VA flow by following below practices which are worth sharing.
[This is my first blog writing, so you may find some issues in the flow, Your feedback will help in improvement]
Activation
[You can skip this section if already activated VA]
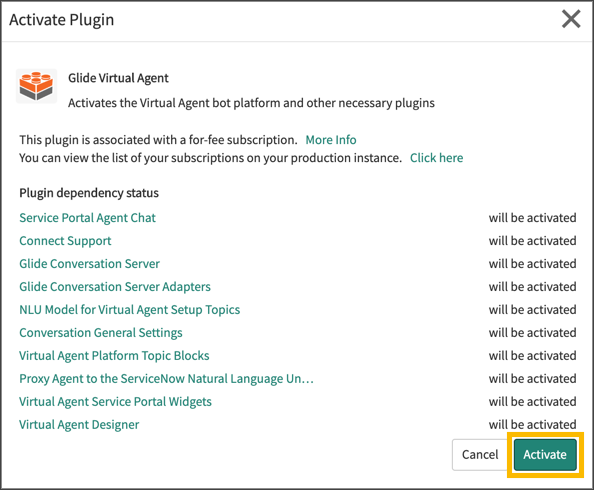
- Go to Plugins and search for “Glide Virtual Agent”.
- Click on the “Install” button, a pop-up appears and click “Activate”.
- A progress bar appears which closes once activation is completed.
Pre requite: You should have a subscription to install the plug-in. If you are planning for ServiceNow NLU you should activate NLU Plugin activation include portal widget so no need to activate additional plugins for portal.
Activation
[You can skip this section if already activated VA]
- For Madrid release of ServiceNow, set up is not required. For NewYork & Orlando releases, we have set up to configure settings Virtual Agent > General Settings.

Adding VA widget into portal:
1. Navigate to the portal landing page, where you want to view the portal widget.
2. Open page in page designer.
3. Search for the widget Virtual Agent Service Portal from the leG page .
4. Drag and drop the widget to the leG bottom. (Can be added anywhere on the page as the position of the icon is fixed).
5. Navigate to the required portal. Icon should appear on the right corner as below.
If you want chat to be available on all pages of the portal then create a footer widget and add it to the theme.
Scripting in Virtual Agent
Variables in VA Scripting
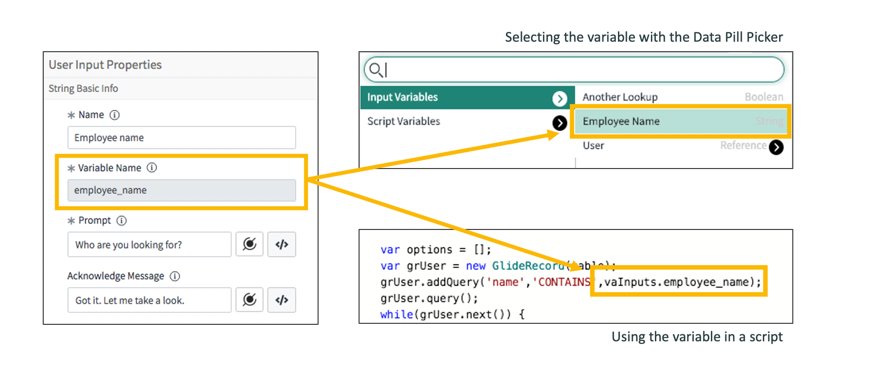
- Most commonly used variables are vaInputs, vaVars. These are global objects that can be utilized throughout the flow. we also have system level variables e.g. vaSystem, which gives you capabilities to switch topic, get user last input etc.
- vaInputs.user is a GlideRecord object for logged-in users. you can access any field value of logged-in user record using dot walk. We can understand this variable using the following example.
vaInputs.user.company, vaInputs.user.department will return you sys_id of the logged-in user’s company & department respectively.
Input Types & Best Practises
Below inputs and bot responses can be used to enhance the flow for a better results and user experience
1.Making input text mandatory
Sometimes while taking input from the user, it is critical to receive some mandatory information. Virtual agent flow cannot validate input text as mandatory.
We will try to understand the impact of non-mandatory using simple examples of creating an incident.
Describing an issue is critical information, while user is able to submit with blank response
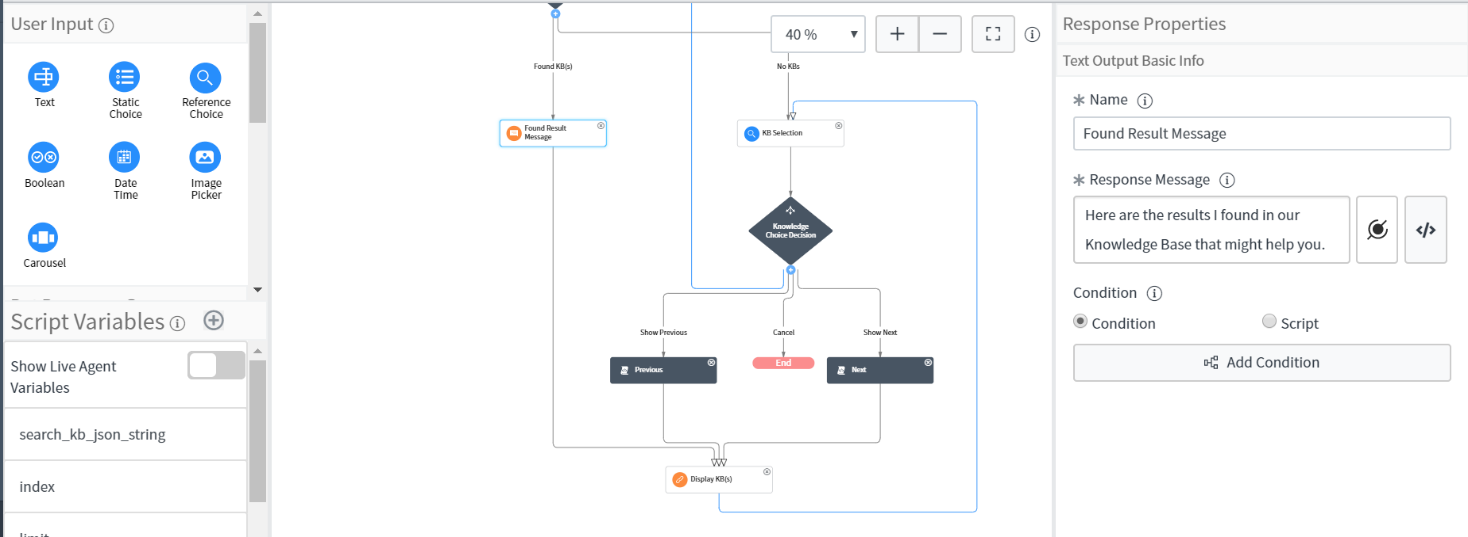
We can review the VA flow and it has short description activity but there is no provision of making it mandatory before Orlando release.
 We don’t have a direct way to make input mandatory till Orlando in older versions we have to iterate until we have value through a check by decision and hence we change the flow as below
2.Handing Static choice for branching
As per best practices when you have a decision based on the input i.e. “flow a” when the input value is A and “flow b” and input value B.
It is recommended to add a default value and its associate flow. This would help you handle errors that arise when input has been omitted due to a condition but the decision was expecting a value.
3. Confirmation messages for reference choice
Most common piVall while using reference choice is ignoring confirmation messages. The below scenario should give some detail of impact explained while approving a request.
The flow is a short flow for approving a request where Show requisitions input shows a list of approvals requested for logged-in users. A confirmation message is a trigger when a show request has only one record (option).
In the case below when flow runs usually expect it to prompt the circled part above.
But instead when reference choice has only one option to display instead of prompt it asks for confirmation of the option as seen below.
In the above image, the show_request prompt creates a question for the user as the user is not aware of the name provided. Instead of relying on the OOTB confirmation message provide a custom message.
Let’s try to fix this by creating a script variable and store sample code is below:
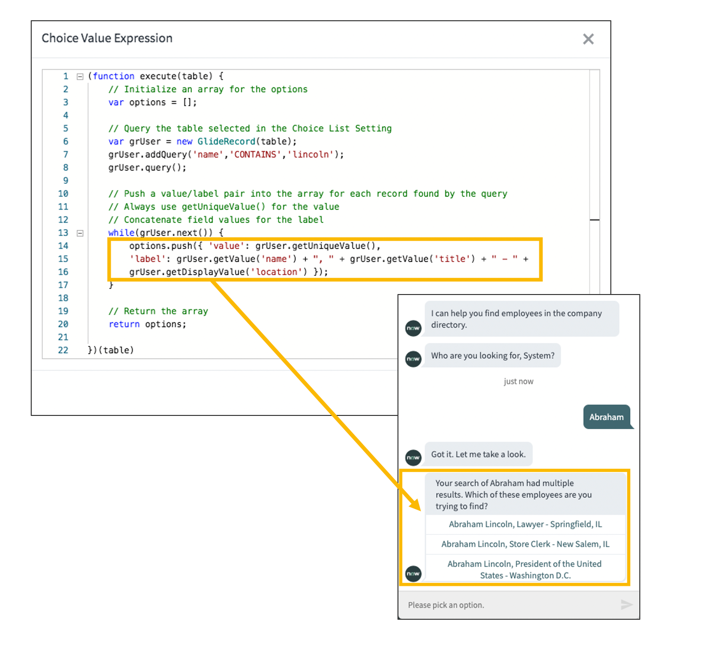
store_show_request stores option label which needs to see by the user. Make changes to the confirmation message as below.
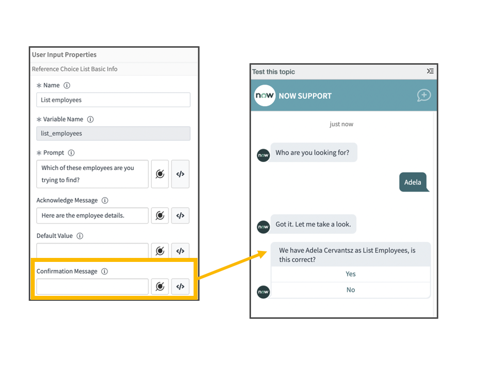
Once the above fix is applied promptly for conformation changes as below:
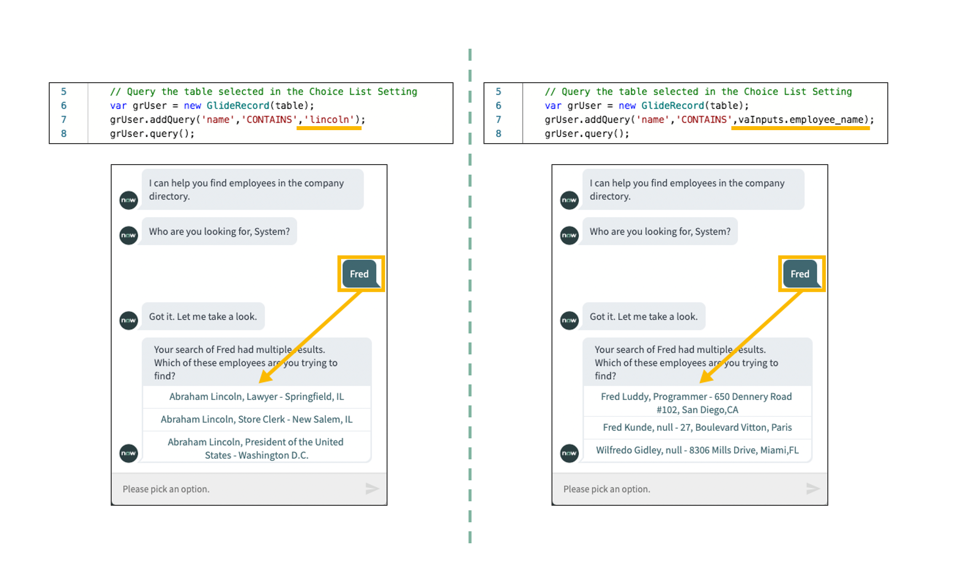
For Acknowledge Message/ any output for user experience where you require to show the choice selected use vaInputs.reference_list.getDisplayValue() in script. The below image shows difference without display value and with display value
Without using getDisplayValue() vs using getDisplayValue()
TIP: Choice list script gets processed before the prompt message so in case you want to show the choice label in the confirmation message then create a flow variable and store the option label . Utilize the confirmation prompt script.
4. Using image Picker for effective communication
Image picker provides a complete URL to the image stored in db_image table. Best way to provide URL as :
https:// gs.getProperty(‘instance_name’).service-now.com/<image url> . This will create smooth movement to move from instance to instance.
5. Scripted Text responses
Text response can be static or dynamic (scripted) . The actual beauty of text response is “show HTML”. OOTB html response is static and using text response we could achieve dynamic HTML as output. Sample response below for reference.
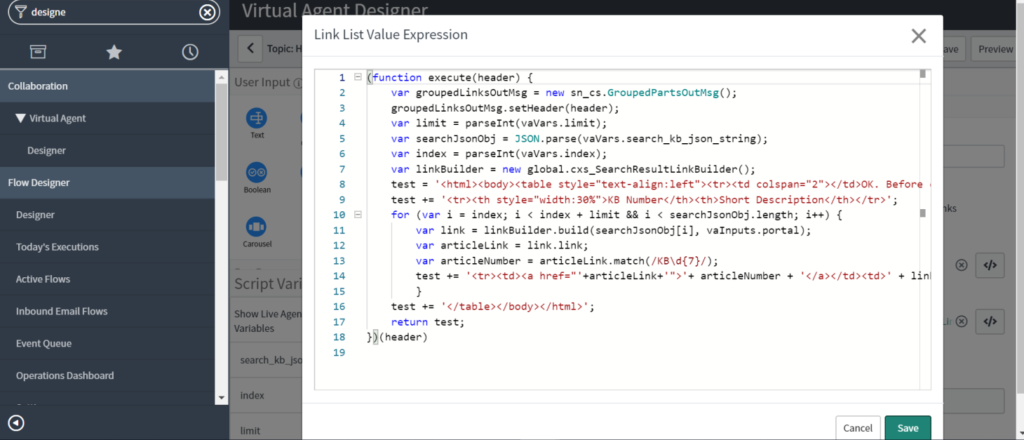
Note: Script should use and return HTML within single quotes.
More blogs will be an add-on to the series where I will explain how to handle corner cases, debugging mechanisms, and use cases.


